Scheduling Your First Test Stream
Last Updated: April 19
This tutorial will guide you through scheduling a 45-minute test stream event to make sure your streaming equipment works with the platform and teach you the basics of managing your stream events from the MyRaces.Live portal.
What you will need
A computer or mobile device to access the MyRaces.Live portal and manage your stream events.
A streaming equipment to send your live video feed to the platform. (e.g., MineA5, Yi4K+, LiveU Solo, StreamLabs, etc.)
A YouTube Account with live streaming enabled, connected to the MyRaces.Live platform (see Connecting your YouTube Account below).
Note
YouTube requires up to 24 hours to activate live streaming on new accounts. Make sure to enable it in advance.
For detailed instructions on how to connect your YouTube account, refer to Streaming to your own YouTube account.
If you’re using the MyRaces.Live streaming kit with the MineA5 camera, make sure to first follow these tutorials to get familiar with the camera and its phone app:
Follow Live Streaming on the MINE A5 using the Touch Screen to get familiar with the touch screen interface of the MineA5 camera.
Follow Live streaming with the MINE A5 using the MLive phone app to learn how to remotely control your camera.
For this test, we recommend using the following streaming settings:
Resolution: 720p
Rate: around 2500-2800 kbps
FPS: 30fps
Creating a new account
If you don’t have an account yet, follow these steps:
Open a browser and navigate to portal.myraces.live
Click on “Sign Up” to create a new free account.
A verification email will be sent to your email address. Once your email is verified you can login with your user.
Trouble logging in?
Tip
Make sure you have completed the email verification step. You won’t be able to log in until you verify your email address.
Check your spam folder if you don’t see the email in your inbox. If you still don’t receive the email, please contact support.
Always use your username to login (not your email address).
If you forgot your username or password, use the “Forgot your username or password?” link on the login page to recover your username and/or password.
Adding a new team and drivers
Creating at least one team and one driver is required before scheduling any stream event.
Log in to the portal.myraces.live
Go to Stream Management > Racing Team and create a new team.
Go to Stream Management > Drivers and create a new driver.
Add the new driver to your team.
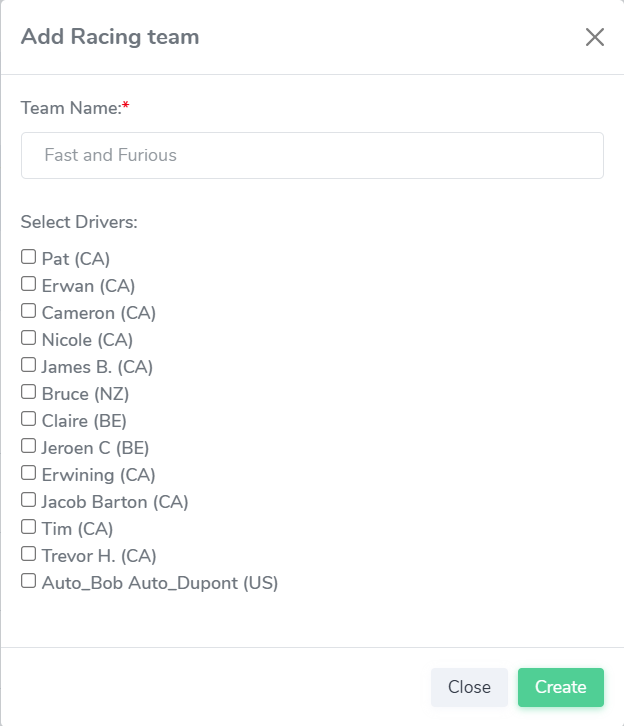
Create a New Team |
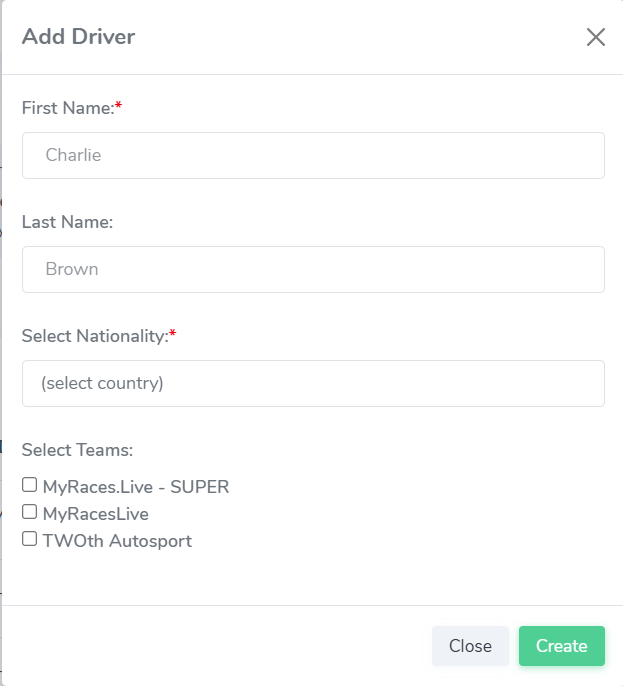
Create a New Driver |
Note
The driver name is displayed in the overlay as “FIRSTNAME <FIRST LETTER OF LASTNAME.>”. For example: John Doe will be displayed as “JOHN D.”. If you want to display the full name, simply enter the full name in the “First Name” field and leave the “Last Name” field empty.
Connecting your YouTube Account
Before scheduling a stream event, you must have at least one connected YouTube channel or one custom RTMP destination configured.
Follow the instructions in Streaming to your own YouTube account to connect your YouTube account and link your channel to the platform.
Then come back here to proceed with scheduling your first test stream event!
Scheduling a test stream event
Now, you’re ready to schedule your first test stream.
Make sure you have your streaming equipment with you before starting this step and that you know how to configure it to send a stream to a custom RTMP URL.
Using the left side menu, navigate to Stream Management>Streams.
Click on “Schedule a Stream Event” and complete the form as follows:
- Under “Stream Details”:
Stream Name: Enter a name for your test stream (e.g., “Test Stream 1”). This name will also be used as the title of the YouTube Live broadcast on your connected channel.
Start Time: Leave it as is (current time).
End Time: Set it to 45 minutes after the start time.
Connected Channel(s): Check the box next to your connected YouTube channel.
Visibility: Select the visibility for your YouTube Live (Public, Unlisted, or Private).
Click on “Add Overlay” to move to the next step..
- Under “Overlay”:
Racing Team: Select your racing team from the dropdown menu
Driver: Select the current driver from the dropdown menu
Car Number: Enter the car number (this will be displayed in the overlay)
Race Data Source: leave it to “-None-”
Custom Overlay: leave it to “Default”
Click on “Add Camera Info” to move to the next step..
- Under “Camera”:
Source Camera: leave it to “My Default Camera”.
Finally, click on “Start”.
On the same page, navigate to the tab called “Live Streams”.
There, you should see your stream event with the status “Live” and Infra Status updating from “Down” to “Deploying” (see picture below).
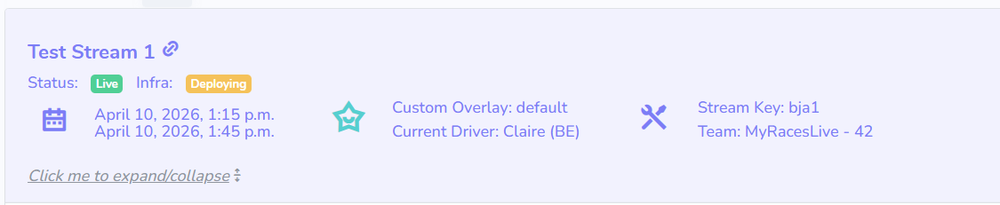
Stream Event Status - Deploying
Wait up to 2 minutes until the stream event infra status shows “Ready” (in green). This means the platform is ready to receive your camera stream.

Stream Event Status - Ready
Note
If the infra status stays in “Deploying” for more than 5 minutes, or if the status changes to “Failed”, please contact support.
Configuring your streaming equipment with the RTMP URL
While you’re waiting for the stream event to be ready, let’s find the RTMP URL that you will need to configure in your streaming equipment. Every camera and streaming equipment is different, but the general idea is to configure your camera’s RTMP URL to the one associated with your stream event.
An MyRaces.Live RTMP URL looks like rtmp://1234.myraces.live/1234/cam1 and is unique to the source camera (ex: “My Default Camera”) you selected for your stream event.
There are two locations in the portal where you can find the RTMP URL:
- From the “Stream Management > Streams” page:
Click on your live Stream Event to expand it (if it’s not expanded already).
Scroll down to the “CAMERA CONFIG” box.
Look for the “Full RTMP URL”.
- Or, from the “Stream Management > Cameras” page:
Go to Stream Management > Cameras.
Find your default camera (or the camera you are using for your test stream event).
Look at the “Stream URL” column to find the full RTMP URL.
Equipment Specifics
- For MineA5 cameras:
Refer to the Live Streaming on the MINE A5 using the Touch Screen and Live streaming with the MINE A5 using the MLive phone app tutorials for detailed instructions on how to configure the RTMP URL and start streaming from the MineA5 camera.
- For Yi4K+ cameras:
Use the “Show QR Code” button under Cameras > Default Camera.
- For other equipment (LiveU Solo, Prism Live, StreamLabs):
If a “Stream Key/Code” is required by your equipment, use the short RTMP URL format (e.g.,
rtmp://1234.myraces.live/1234/) and usecam1as the Stream Key.
Making sure you are “Live”
In the Live Streams tab, scroll down to the “Live Streams Health” under your Stream Event and click on the refresh icon.
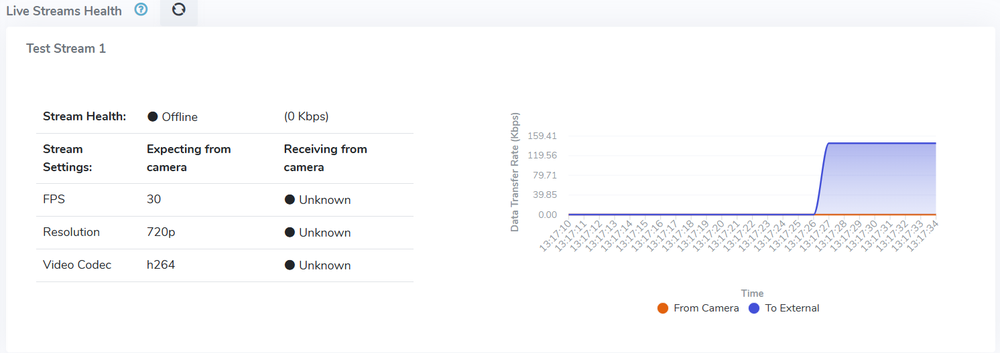
Stream Health - Blue Line Up
The blue line represents the stream being sent from the MyRaces.Live platform to your connected YouTube channel and/or custom RTMP destinations.
When there’s no camera feed, the MyRaces.Live platform sends a “CAMERA OFFLINE” video feed.
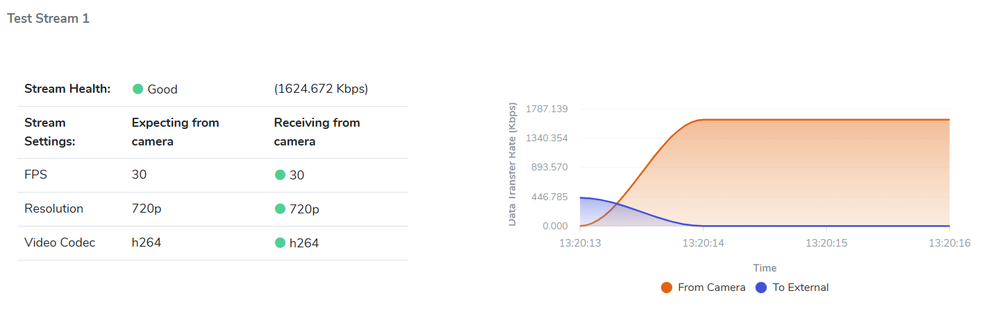
Stream Health - Orange Line Up and Blue Line Down
Once your camera starts streaming, the orange line representing the input from your camera stream should start spiking up.
Stream Health - Orange Line Up and Blue Line Down
The blue line will then drops and start again (after a 15-20 seconds) as the platform switches from the “CAMERA OFFLINE” feed to your live camera feed.
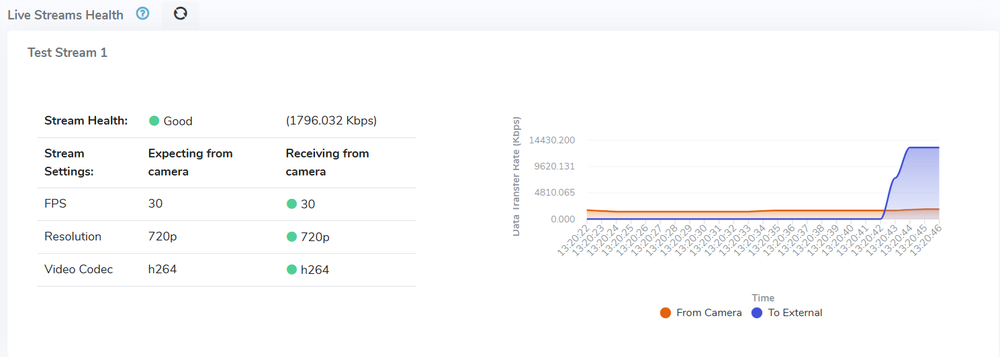
Stream Health - Both Orange and Blue Lines Up
Note
If the orange line stays at zero, the platform is not receiving video. Check your network connection and the configured RTMP URL for any typos.
Where to watch your stream?
Your stream is broadcast to the destination(s) you selected when scheduling the stream event.
If you connected your YouTube channel, your YouTube Live is automatically created and started by the platform. To find the link to your YouTube Live:
Click on your stream event to expand it.
Look inside the “STREAM DESTINATIONS” box for your connected channel and the YouTube Live link(s).

Stream Destinations - Where to watch your stream
Change Current Driver
To change your current driver in the overlay, select a different driver from the dropdown menu in the “My Team” box.
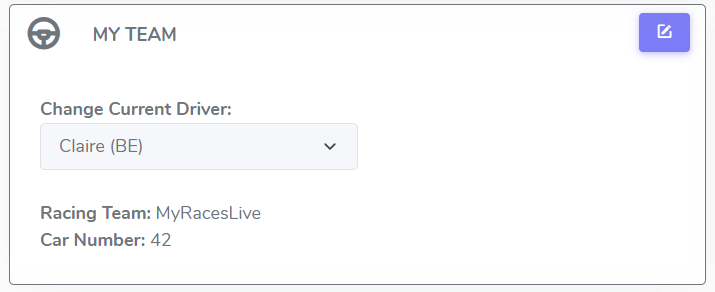
Team Box with Driver Dropdown
Adding Live Timing
Let’s see how to add live timing data to your stream overlay.
- Let’s use a Race Monitor event as an example:
The event we will use is the Replay - 2015 US Open Masters Max event.
The car number we will use is “625”.
- Let’s first update the car number in the “My Team” box to “625”:
Click on the “Edit” icon top right corner of the “My Team” box.
Update the car number to “625” and click “Update”.

Live Timing Box with Edit Icon
Click on the “Edit” icon top right corner of the “Live Timing” box.
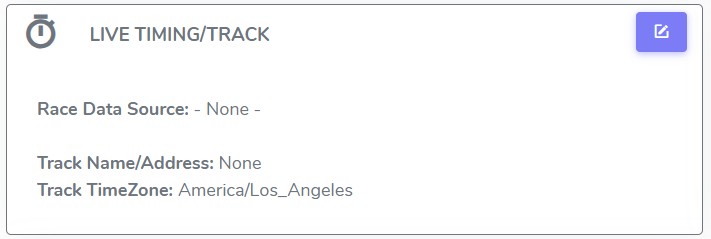
Live Timing Box with Edit Icon
In the form that opens, select “Race Monitor” as your live timing source
Search for and select the event called “Replay - 2015 US Open Masters Max”
Click “Update”
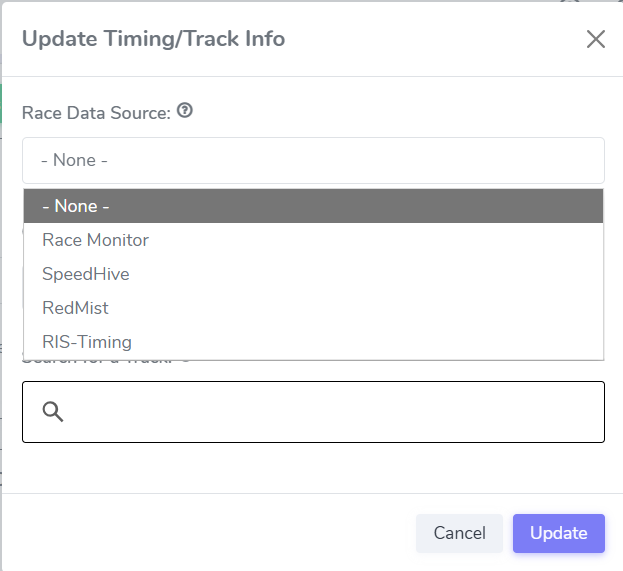
Live Timing Update Form
Wait for about 15 seconds to see the live timing data in your stream overlay (current flag, lap times, gaps, etc.).
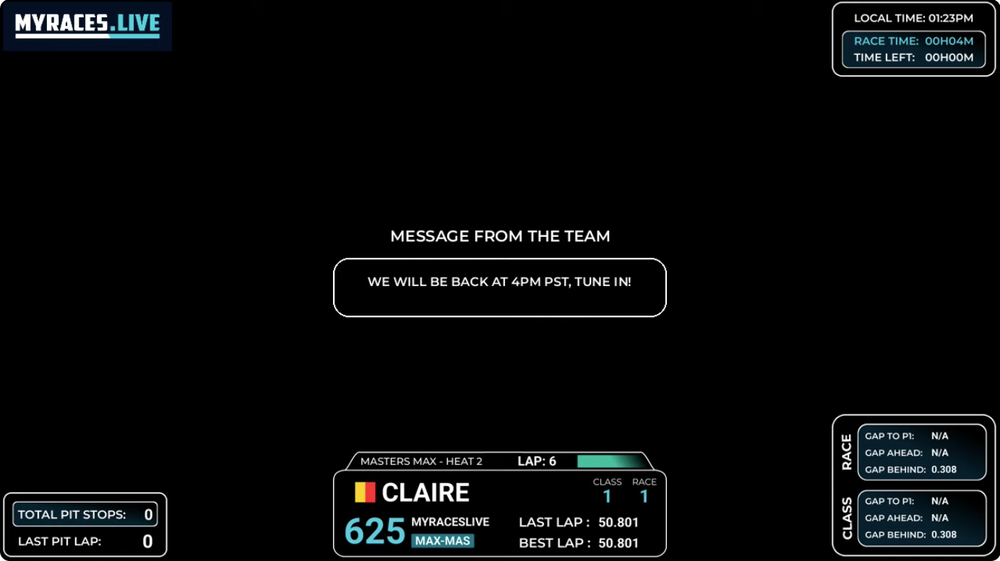
Stream with Live Timing Data
Pausing the Test Stream
You can pause the stream at any time by clicking on the “Pause” button.
This will hide the camera feed and overlay a custom text message.
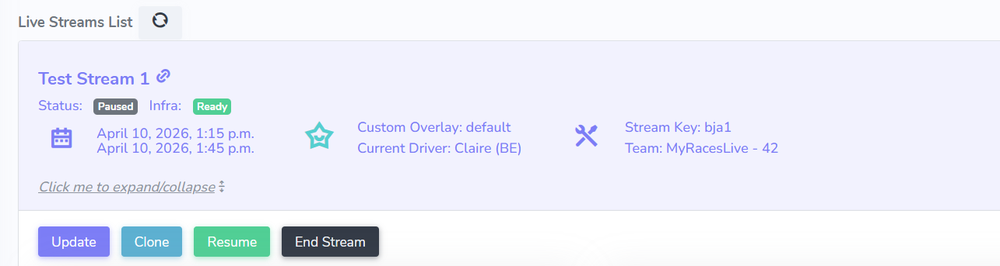
To resume the stream and show the camera feed again, simply click on the “Resume” button.
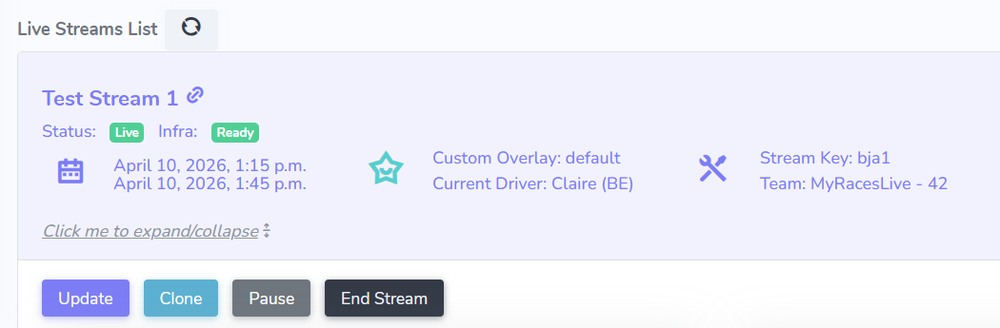
Stream Actions
Stream Paused Form
Paused Video Feed
Ending the Test Stream
Unless you extended the end time during the stream creation, the test stream is scheduled to last for 45 minutes. Once it reaches the stop time, it automatically stops the YouTube Live on your connected channel, tears down the stream infrastructure, and moves the stream event to “Past Streams”.
You can always use the “End Stream” button if you want to end a stream event before the schedule end time.
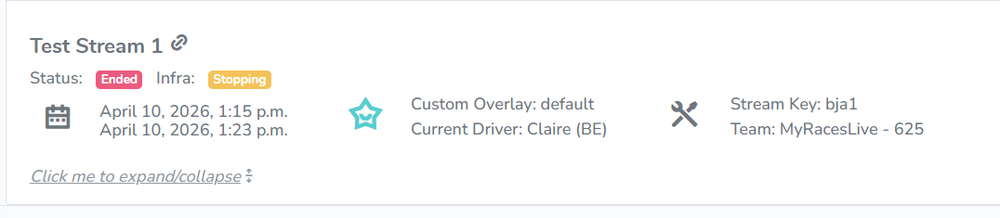
Stream Event Status - Stopping