Click on the “gear” icon located on the right side of the main screen. From the Settings page, navigate to Venc > Live.
Then, configure the following:
Resolution: 720p
Bitrate: around 2500-2800 kbps
Frame rate: 30fps
Bitrate type: CBR
Profile: Main
GOP: 3
Encoding Type: H.264
Note
MyRacesLive streaming services does NOT yet support H.265 with the MineA5.
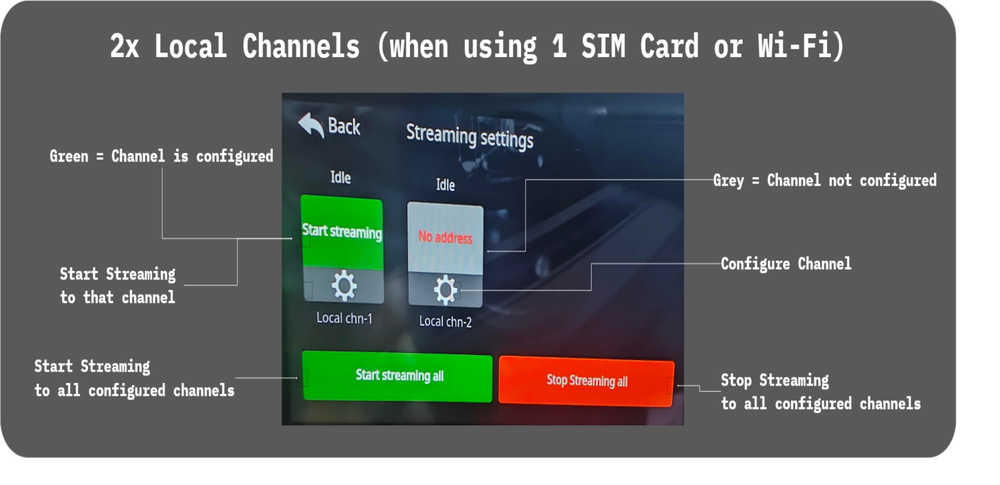
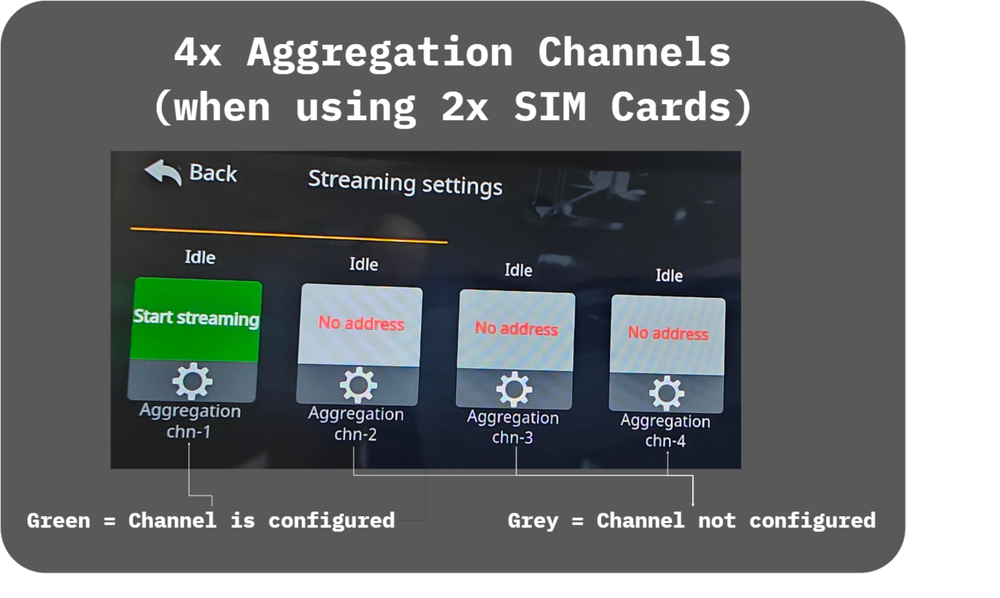
Next, click on the “Cloud” icon in the bottom-right corner, and under the “All Channels” tab, scroll down until you see two boxes labeled “Local chn-1” and “Local chn-2”. A green box means it’s already configured with a streaming destination. Select either a green or grey box, then click on the “gear” icon to set or update the stream destination.
There are two ways to do this when streaming to MyRacesLive:
Option A: Scan the QR Code (recommended)
On the MyRaces.Live website, go to the Streams page, click on your Stream Event > scroll down to the “CAMERA CONFIG” box.
Click on the QR Code icon to display the QR code for your stream destination.
On the MineA5 touch screen, tap the QR scan icon in the top-right corner and scan the QR code. This will auto-populate the Streaming Address with the full RTMP address. MAKE SURE TO LEAVE the Stream Code/Name field EMPTY when using this method.
Click “Start Pushing” to save the configuration and/or start streaming.
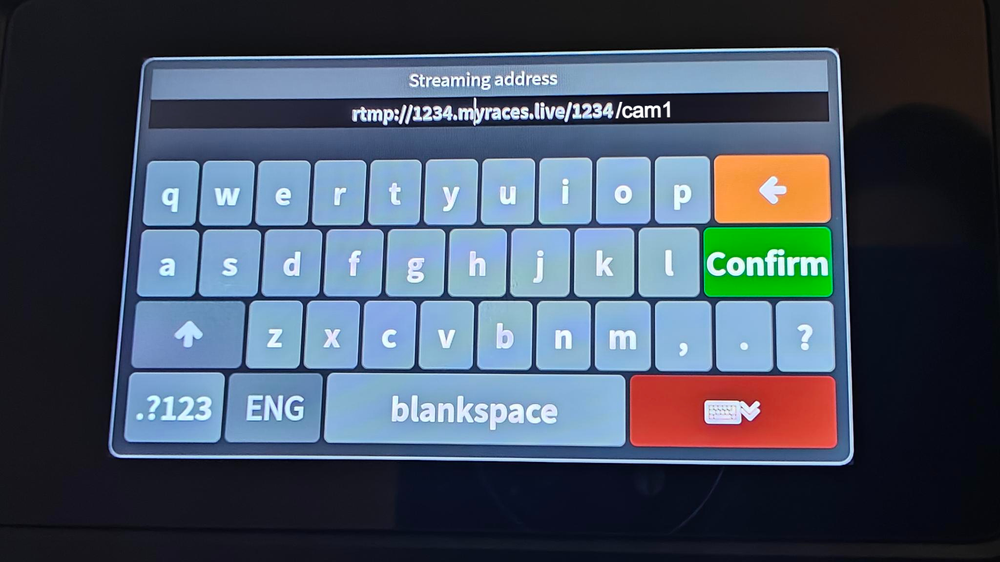
Option B: Enter the RTMP URL manually
On the MyRaces.Live website, go to the Streams page, click on your Stream Event > scroll down to the “CAMERA CONFIG” box.
You can enter the RTMP URL in two ways:
Full URL: Enter the full RTMP URL (including the /cam1 at the end) in the “Streaming Address” field, and leave the “Stream Name/Code” field empty.
Short URL + Stream Code: Enter the RTMP URL without the /cam1 part in the “Streaming Address” field, and enter cam1 in the “Stream Name/Code” field.
Click “Start Pushing” to save the configuration and/or start streaming.
The RTMP configuration step is crucial — make sure the Streaming Address and Stream Name/Code fields are populated per the instructions above!!
If you want the camera to automatically start streaming to the configured destination when powered on, toggle the option “Auto streaming when power on”, then click “Start Streaming.” This will save your settings, even if you don’t intend to stream immediately.
If the camera successfully connects to the RTMP destination and starts streaming, a green LED will begin blinking next to the cloud icon, the “local-chn” box will display “live,” and a “stop streaming” button will appear. If the camera cannot stream to the specified destination, an Info window will pop up saying the connection failed.
If the connection fails, ensure you have a strong network signal reception and double-check that the stream destination is configured correctly
(it’s easy to make a typo).