Live streaming with the MINE A5 using the MLive phone app
Last Updated: April 19
The MLive phone app allows you to connect to and configure your MineA5 camera remotely using your phone. Here’s a quick tutorial to start live-streaming with your MineA5 using the MLive phone app.
Downloading the MLive App on Android or iPhone
- Go to https://www.minemedia.tv/resources/
Click on the “App” tab and follow the instructions
Or, scan this QR Code with your phone
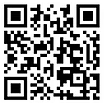
MLive App QR Code
After installing the MLive App, you can directly log in using the username and password provided with your MyRacesLive livestreaming kit (look for the grey sticker on your MineA5 Guide, use the “ID” in the “username”/”phone number” field, and “PWD” in the “password” field). You do not need to create a new account.
Once you’re logged in, you can add your camera by clicking on “Add Device” in the top right corner and scanning the QR code displayed on the grey sticker or the QR code on your camera. Enter a name for your camera and click “Add Device”.
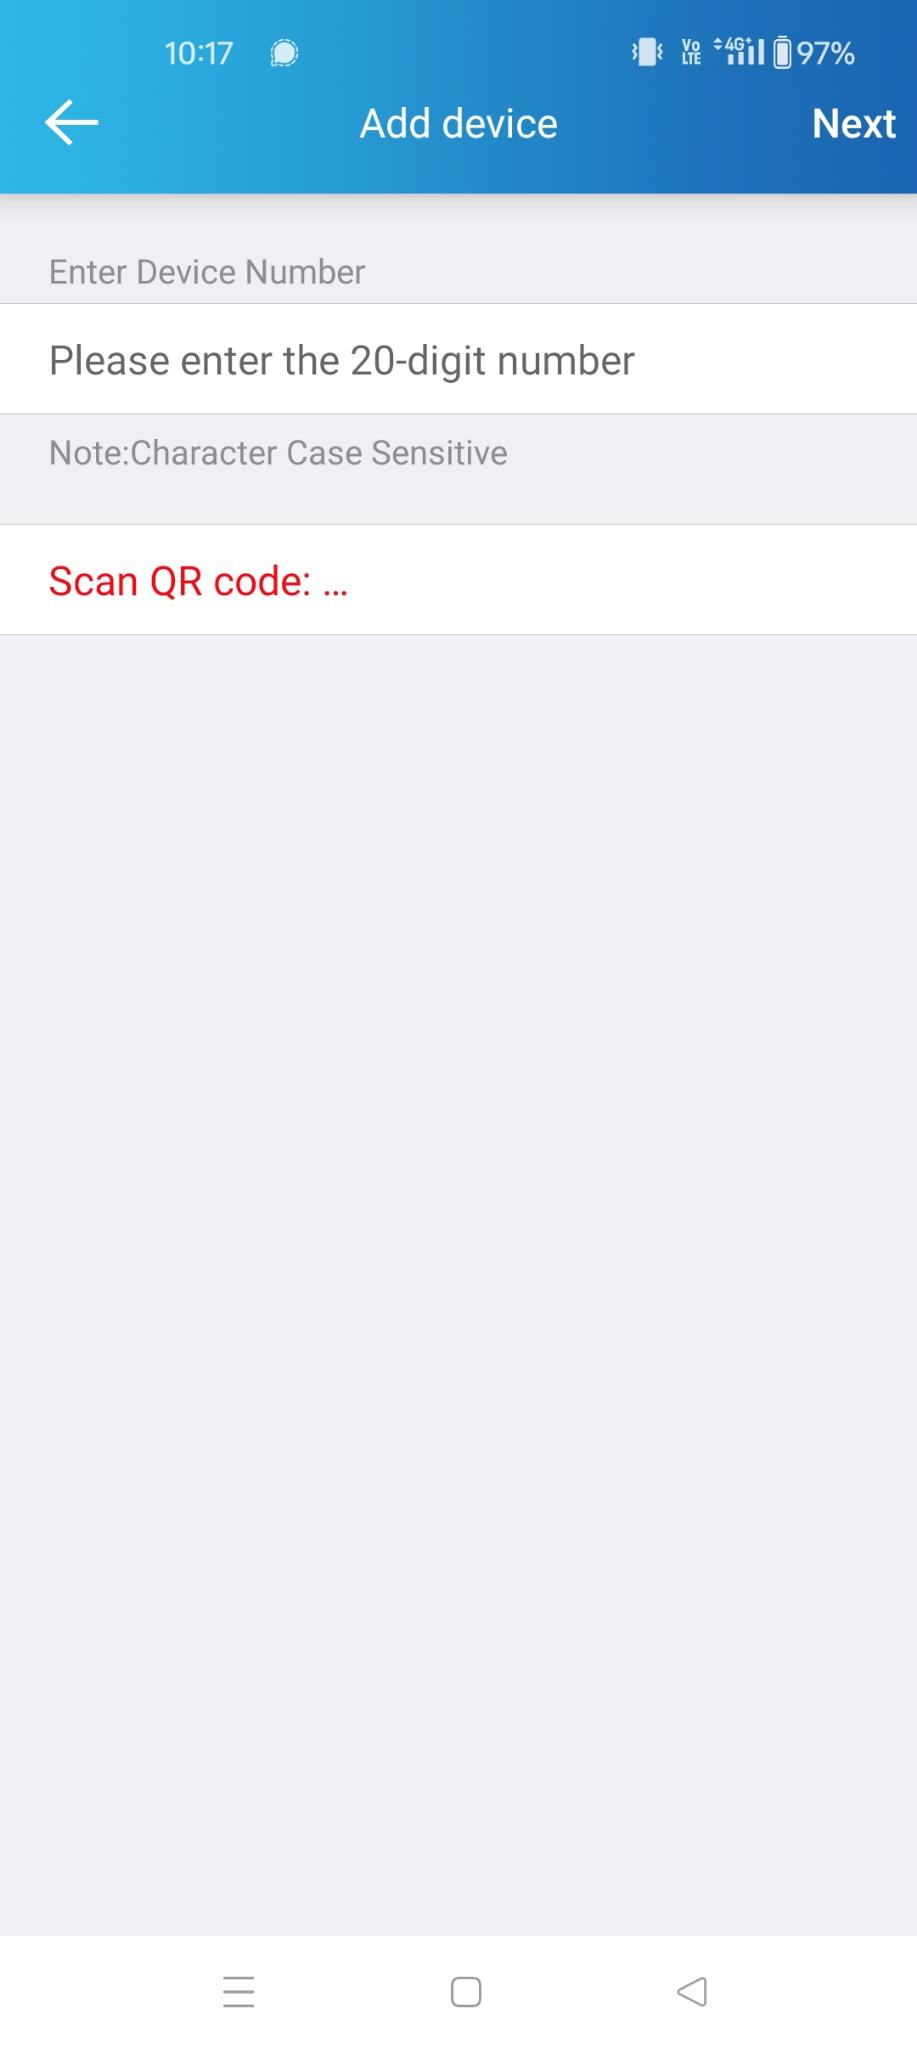
Add Device
If your camera is connected to the Internet (either via Connecting your camera to a 4G network or Connecting your camera to a local WiFi), it will show as “Online” and you can click on the device to control it remotely:
Configure/Start/Stop a live stream (“Push Flow”)
Check the battery level (“Device Info”)
Adjust the audio settings (“More Settings” > “Audio Set”)
Adjust the video settings (brightness, contrast, etc, under “More Settings” > “Camera Set”)
Etc.
This is very convenient if you need to change a setting when the car is already on track.
Tip
If your camera is not showing as “Online”, make sure it is powered on and connected to the Internet. Then, perform a drag down motion on the “Device List” page to refresh the connection status.
Configuring live streaming settings using the MLive App
Wait for your camera to show “Online” then click on the “More…” settings button.
More Settings Button
Click on Common Settings > Live Stream and configure the following streaming settings:
Resolution: 720p
Rate: around 2500-2800 kbps
FPS: 30fps
BitRate Control: CBR
Encoding ProFile: Main
Frame Interval: 3
Encoding Type: H.264
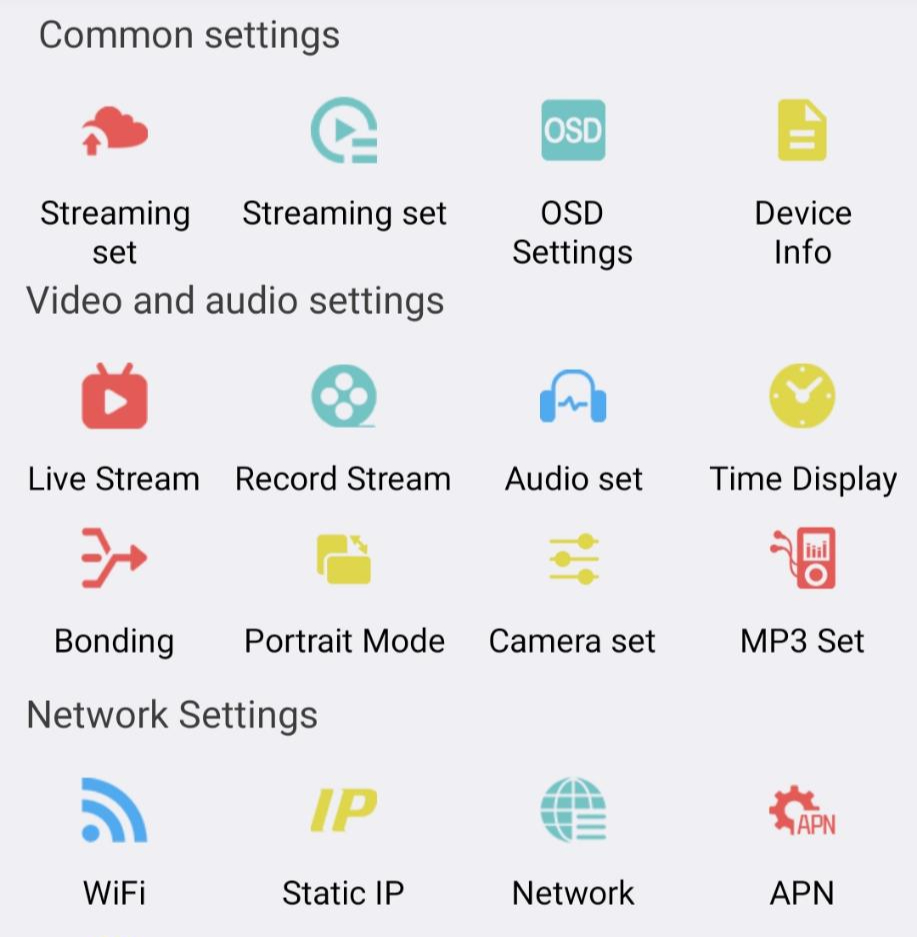
Common Settings Menu
Starting the stream using the MLive App
From the device list, click on the “Push Flow” button under your device.
Push Flow Button
Under “Single Network Streaming”, click on “Channel binding 1”:
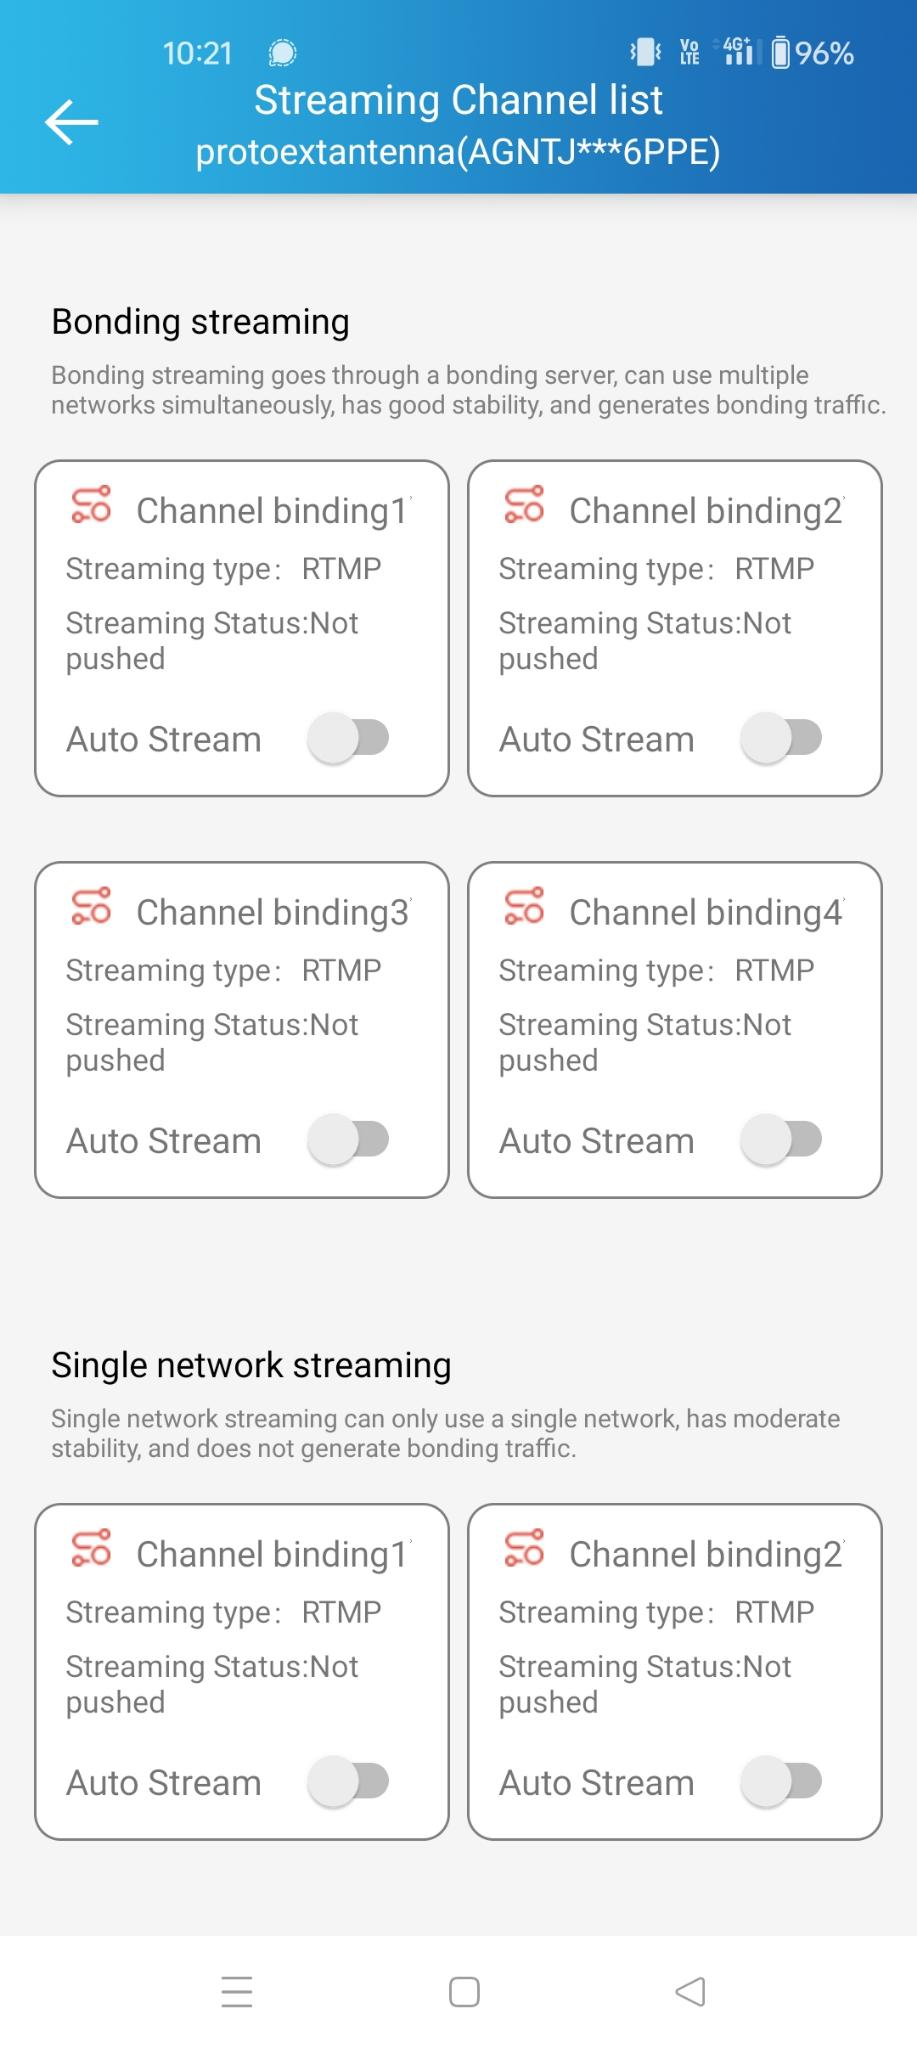
Channel Binding Configuration
This is what you should see now:
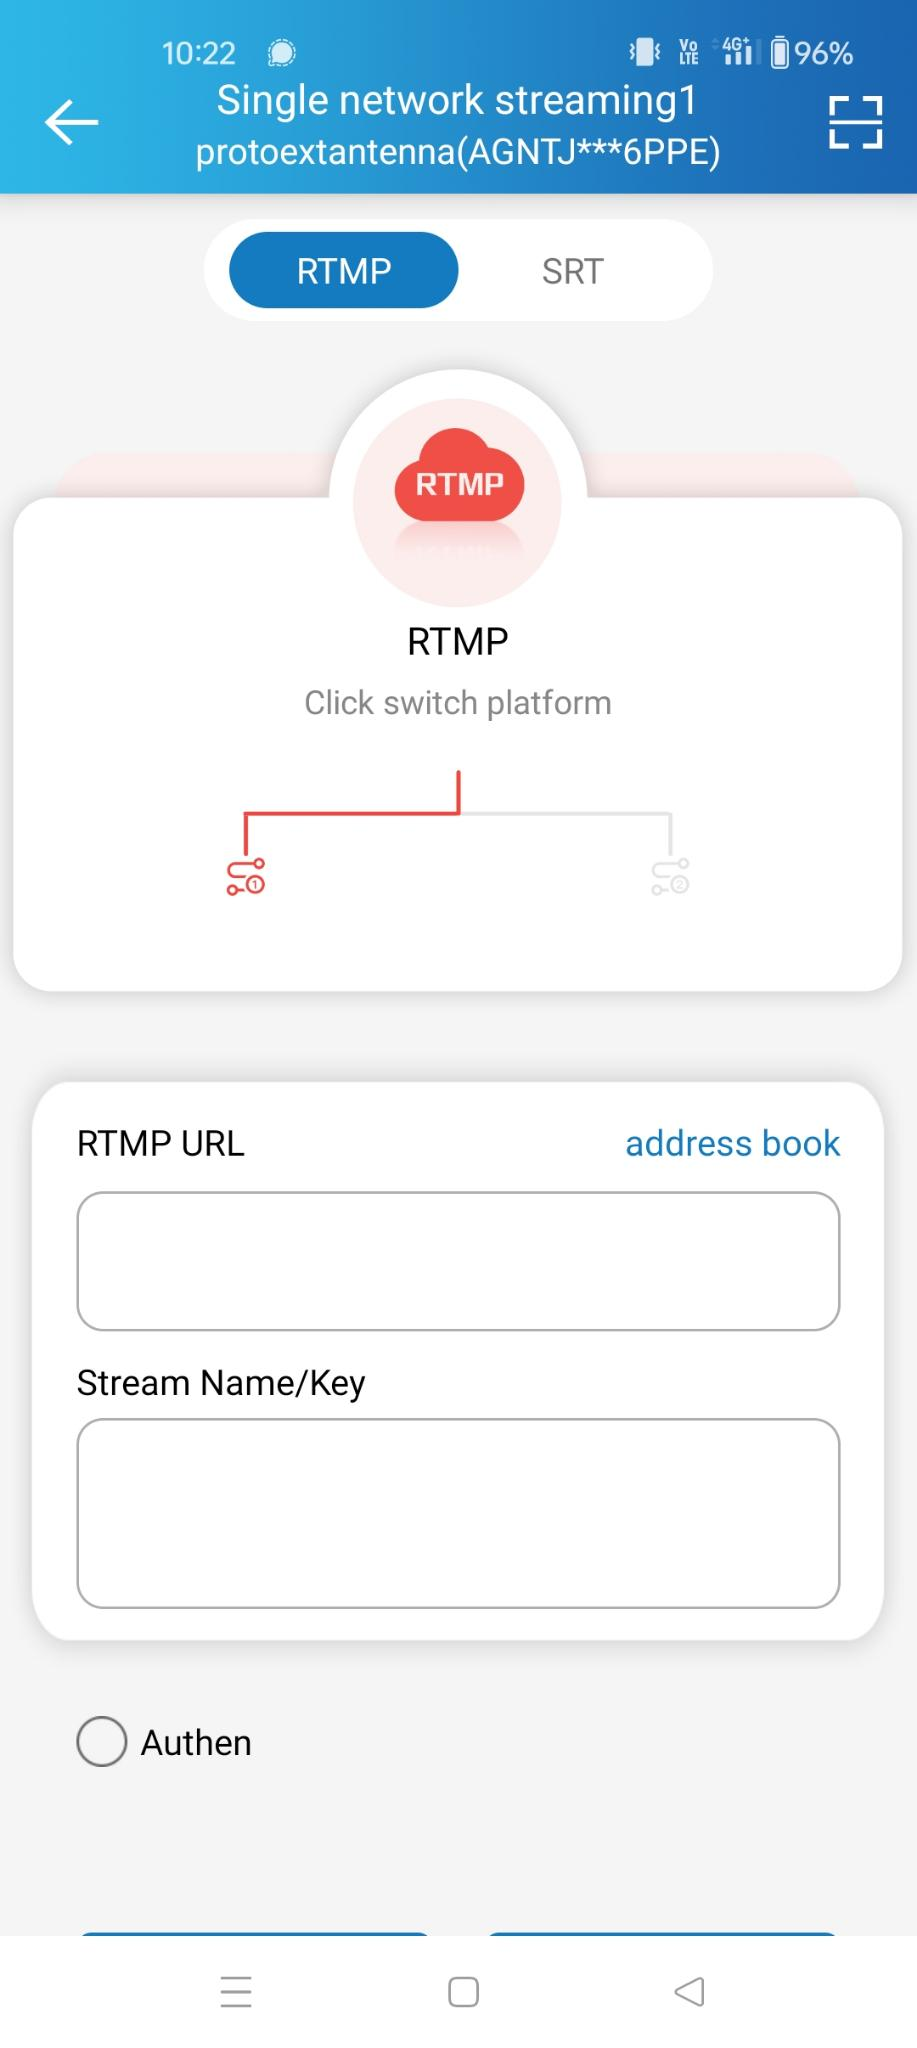
There are two ways to configure the RTMP fields:
Option A: Scan the QR Code (recommended)
On the MyRaces.Live website, go to the Streams page, click on your Stream Event > scroll down to the “CAMERA CONFIG” box.
Click on the QR Code icon to display the QR code for your stream destination.
In the MLive app “Channel binding 1” screen, tap the QR scan icon in the top-right corner and scan the QR code. This will auto-populate the RTMP URL and Stream Name/Key fields.
Click on “Save Address” at the bottom of the screen.
Option B: Enter the RTMP URL manually
On the MyRaces.Live website, go to the Streams page, click on your Stream Event > scroll down to the “CAMERA CONFIG” box.
You can enter the RTMP URL in two ways:
Full URL: Copy the full RTMP URL (including the
/cam1at the end) into the “RTMP URL” field, and leave the “Stream Name/Key” field empty.Short URL + Stream Key: Copy the RTMP URL without the
/cam1part into the “RTMP URL” field, and entercam1in the “Stream Name/Key” field.
Click on “Save Address” at the bottom of the screen.
Once the destination is configured:
- If your Stream Event Infra Status on MyRaces.Live shows “ready”, you can start pushing your stream by clicking on “start pushing”.
If the Infra Status shows “Deploying”, wait another 1-2 minutes until it shows “Ready”.
If the camera successfully connects to the RTMP destination and starts streaming, a green LED will begin blinking next to the cloud icon on the camera, and the “Channel binding 1” box in the MLive app will turn green.
On the MyRaces.Live Streams page, scroll down to “Stream Health”, click on the refresh icon and check if the orange line is going up: this indicates the stream from the camera is being received. After 20/30 seconds, you should see the blue line going up as well, which indicates the stream is being sent to your connected YouTube channel, as well as any custom destinations you have configured.
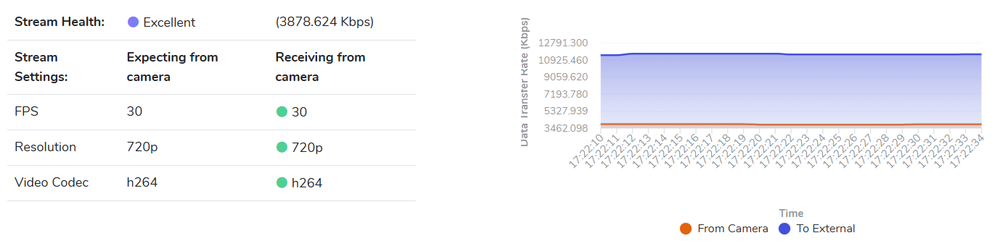
Stream Event Health on MyRaces.Live
If the connection fails, ensure you have a strong network signal reception, and that your MyRaces.Live Stream Event Infra Status is “ready”.
Also, double-check that the stream destination is configured correctly (it’s easy to make a typo).
For future events, if you want your camera to start streaming to the configured address as soon as it’s powered on, you can enable “auto-stream” in that channel.
Enabling the external microphone
Using the MLive app, navigate to “More Settings” > “Audio set”: enable the “External mic” and disable “Inner mic”.
We recommend to set the audio level to around 80% for the external mic, but you can adjust this based on your preference.