Manage your MineA5 from the MyRaces.Live portal
Last Updated: August 25
If you own a MineA5 camera from MineMedia, you can now connect your MineMedia (MLive) account directly to MyRaces.Live and manage your camera from the same portal you already use for your stream events — no more switching between the MLive app / web portal and the MyRaces.Live web portal.
Note
This feature is only for MineA5 (MineMedia) cameras.
Do I have to connect my MLive account?
No — it is recommended, but optional.
If you prefer to use your MineA5 as a BYOD camera, nothing changes. Keep doing what you’re doing.
That said, connecting your MLive account unlocks a lot of convenience:
See your camera’s live status (online / offline) right from the portal.
Automatic validation of your camera’s push-stream configuration, with clear warnings and a one-click Fix when something is off.
Check your battery level, and your streaming and recording status.
Everything in one place — before, you needed the MLive portal and the MineA5 web portal.
Configure your audio, live streaming (resolution / FPS / bitrate / H.264–H.265 encoding) and camera (image flip) settings, and control auto-push on power-on — all from the portal.
Connecting your MLive account
In the portal, go to My Cameras.
At the top you’ll see a banner saying you’re not connected to MineMedia MLive.

Not connected to MineMedia MLive
Click “Connect My MLive account” and enter the same username and password you use for the MLive app (the “ID” / “PWD” on the grey sticker of your MineA5 kit). You do not need to create a new account.
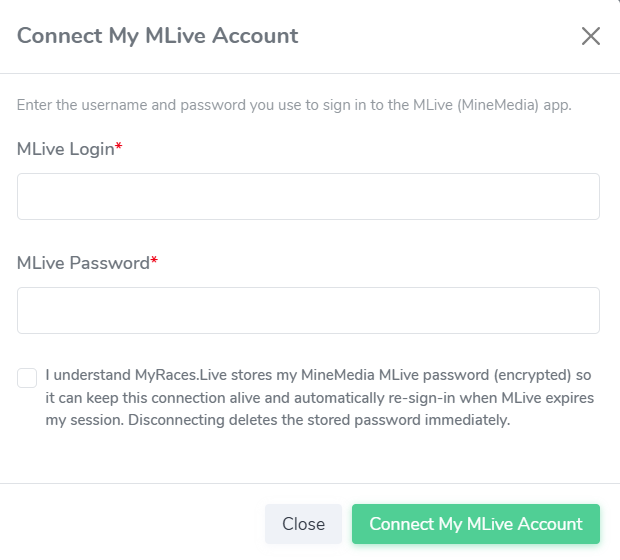
Connect your MLive account
Once connected, your MineA5 cameras appear under the “MineA5 Cameras” tab.

MLive account connected
Binding a new camera
If a camera is not showing up, you can add (bind) it to your account:
Click “Bind New Camera”.
Enter the camera’s serial number — you can scan its QR code with the scan button — and give it a name.
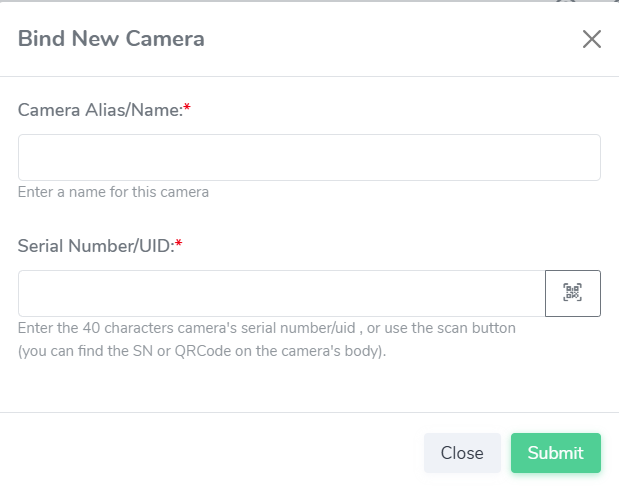
Bind a new camera
First time: check every camera’s configuration
Turn on all your MineA5 cameras and make sure they’re connected to the Internet (via 4G or WiFi) so they show Online in the portal.
For each camera, check that there are no configuration warnings and that the expected RTMP address is the one configured in the camera’s push-stream channel.
A camera whose push-stream configuration needs attention shows a small ⚠ warning icon next to its RTMP URL. Open the camera to see the details:
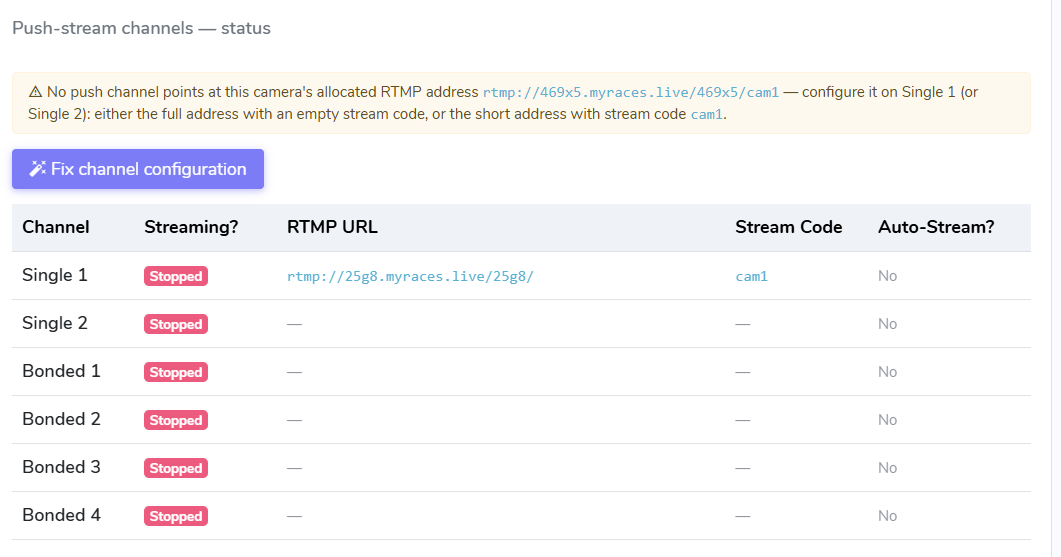
A push-stream channel configured with the wrong RTMP address
The portal expects exactly one streaming channel configured with your
camera’s allocated RTMP address (either the full address with an empty stream
code, or the short address with the stream code cam1), and all other channels
empty. When something doesn’t match, you’ll see a warning explaining what’s wrong.
Click “Fix channel configuration” to have the portal correct it for you automatically — it sets the right address on a streaming channel (“single 1” if a single active SIM card is detected or “bonded 1” if two active SIM cards are detected and you prefer to stream over both uplinks), clears the others, and turns auto-push-on-power-on on for that channel (and off on the rest). The camera must be online and not currently streaming.
Tip
A brand-new camera with no channel configured at all is set up automatically the first time the portal sees it online — no action needed but turning the camera on.
Warning
Switching a camera from BYOD to your MLive account? If you used to run this MineA5 as a BYOD camera, connecting it through your MLive account allocates it a brand-new RTMP address — the address you configured on the camera by hand before (from the touch screen or a QR code) no longer matches, so the camera won’t reach your stream until you update it. The easy fix: turn the camera on, open it in the portal, and click “Fix channel configuration” to apply the new address for you.
Auto-stream (auto-push when powered on)
“Auto-stream” makes the camera start pushing to your allocated RTMP address as soon as it powers on — so at the track you can simply turn the camera on and it connects, with nothing to press in the portal.
The portal now manages this for you:
“Fix channel configuration” and the automatic first-time setup both enable auto-stream on the one correct channel and turn it off on every other channel — so the camera auto-pushes to exactly one destination and never tries several at once.
When a camera’s push-stream configuration is already correct, its status box shows an “Auto-start streaming when powered on” line with the current state and a one-click toggle. Turning it on or off is entirely your preference — it’s not flagged as a problem either way.
The portal still warns you only when auto-stream is enabled on more than one channel (which would push to several destinations at once) — clicking “Fix channel configuration” clears that up.
What you can do from the portal
Once connected, open a camera to see its live status and controls.
Device status — online / offline, battery level, and whether the camera is streaming or recording.
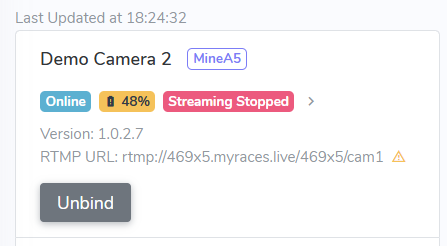
Device status: online, low battery, streaming stopped
Start / stop streaming and recording — when the camera is online, you can start or stop the push stream and the on-device recording directly from the portal.
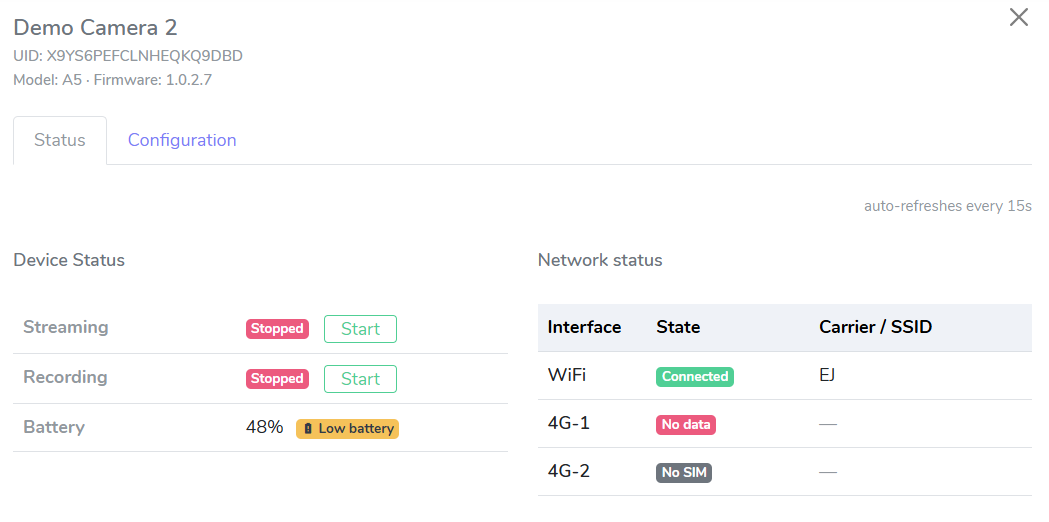
Streaming and recording status, with start / stop buttons
Note
To start streaming, make sure the stream event you scheduled for that camera is “ready” first — otherwise the camera has nowhere to connect and the start will fail.
Live streaming settings — edit the live encoder’s resolution, frame rate, bitrate, and video encoding (H.264 or H.265), when the camera is online and not streaming.
For our recommended values, see H.264 and H.265 (HEVC) Bitrate Guide for the streaming settings, and the audio guidance in Live streaming with the MINE A5 using the MLive phone app.
Audio settings — turn the microphone on/off and set its volume.
Camera settings — see the camera’s resolution (1080p / 4K / Zoom), brightness, contrast, hue and saturation, and edit the image flip. Choose “Rotate 180°” if the camera is mounted upside down — it turns the picture a half-turn the right way up (the “Up-Side Down” option only flips top to bottom, which mirrors the image).
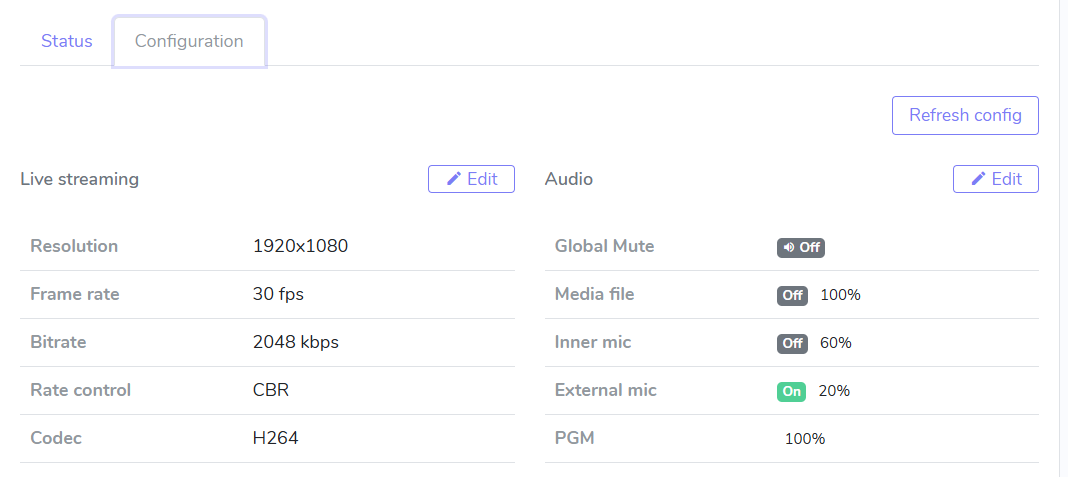
Camera configuration (live streaming, audio and camera settings)
Using your MineA5 camera in a stream event
Once your MLive account is connected, your MineA5 cameras will show up when you schedule or update a stream event — in the Source Camera (primary) and Secondary Camera dropdowns, alongside your BYOD cameras.
The workflow is exactly the same as before: pick your MineA5 camera as the primary (or secondary) source, and finish scheduling your event.